Appearance
Node version manager
Why
When working on multiple front-end application you might get in the situation where you need multiple node versions in order to run those applications. Manually installing and uninstalling node is a time wasting task so another option should be available.
Options?
A well known version manager is nvm, unfortunately it has some drawbacks like:
- Admin permissions are required to change version (prompts are shown)
- Installing & using node versions requires exact version numbers (
nvm use 16does not work when you would like to use the latest version 16) - Auto swapping node versions based on the folder you are in is not supported
- Global installed packages need to be re-installed after swapping versions
Volta has solved many of these issues and is available on windows & Unix (inc. mac). That is why this is our primary choice when it comes to node version management.
Installation
WARNING
Before installing Volta, make sure you uninstall node and nvm when installed
- Install Volta through the company portal.
- Point the volta home directory to your Dev Drive by setting the
VOLTA_HOMEenvironment variable to the appropriate path.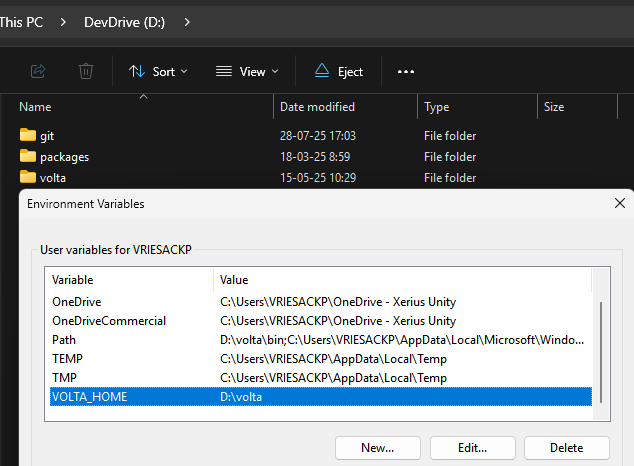
- Add the
bindirectory to yourPATHenvironment variable:%VOLTA_HOME%\bin
More information about volta can also be found here
Usage
Once the installation has finished you can start using Volta
Install node version
volta install node@22Or
volta install node@22.14.0More information about managing your toolchain can be found here
WARNING
Be aware that running the volta install node@x command will install the specified version and set it as the default version for your system. This means that all terminal sessions, VS Code instances (or extensions), and other applications will use this version of Node.js.
Therefore, be sure to have a LTS version (or the one Codey advertises to use) is installed as default. When having to work with an old project that for e.g. needs node@6 set this using the volta pin node@6 command in the project root. This ensures that this version is only applied within that projects scope.
Details
We have encountered this issue while working on a older node@6 project. We had installed node@6 using the install command instead of using pin. This caused the node@6 version to be set as the default version for our system.
As a result, our playwright extension inside vscode was not able to detect any configuration or tests. even though node@22.14 was pinned for our codey directory. The terminal was also showing version 22.14 was in use within the codey directory.
Setting our default version back to node@22.14 fixed the issue. This made clear that it is important to understand the difference between install and pin commands.
Add project config
In order to let Volta know what version your application requires you can use the following command in your projects root:
sh
volta pin node@22This will add the required Volta config to you package.json and lets Volta know what version he needs to use in that directory:
json
"volta": {
  "node": "22.14.0",
}
More details can be found in the docs here